Straight out of the box (or case), AirPods work extremely well – that’s half the reason to buy them! – but you can make them more personal to you by changing AirPods settings on your iPhone or iPad.
On Android, options are very limited, but for iOS users, AirPods offer tons of useful settings and options. You may not realize where you can access it, though, and actually this is something Apple’s improved in recent years (which was necessary, as more of the best wireless earbuds lean into being customizable).
Still, if you need some guidance on what to change and where to look, you’re in luck. We’re on hand with instructions on how to change AirPods settings on all the best AirPods.
Below, you’ll find the necessary steps with the majority of them working on both the AirPods Pro 2 and AirPods 3 along with older models too.
Steps for how to change AirPod settings
- Open the lid on your AirPods, or wear them.
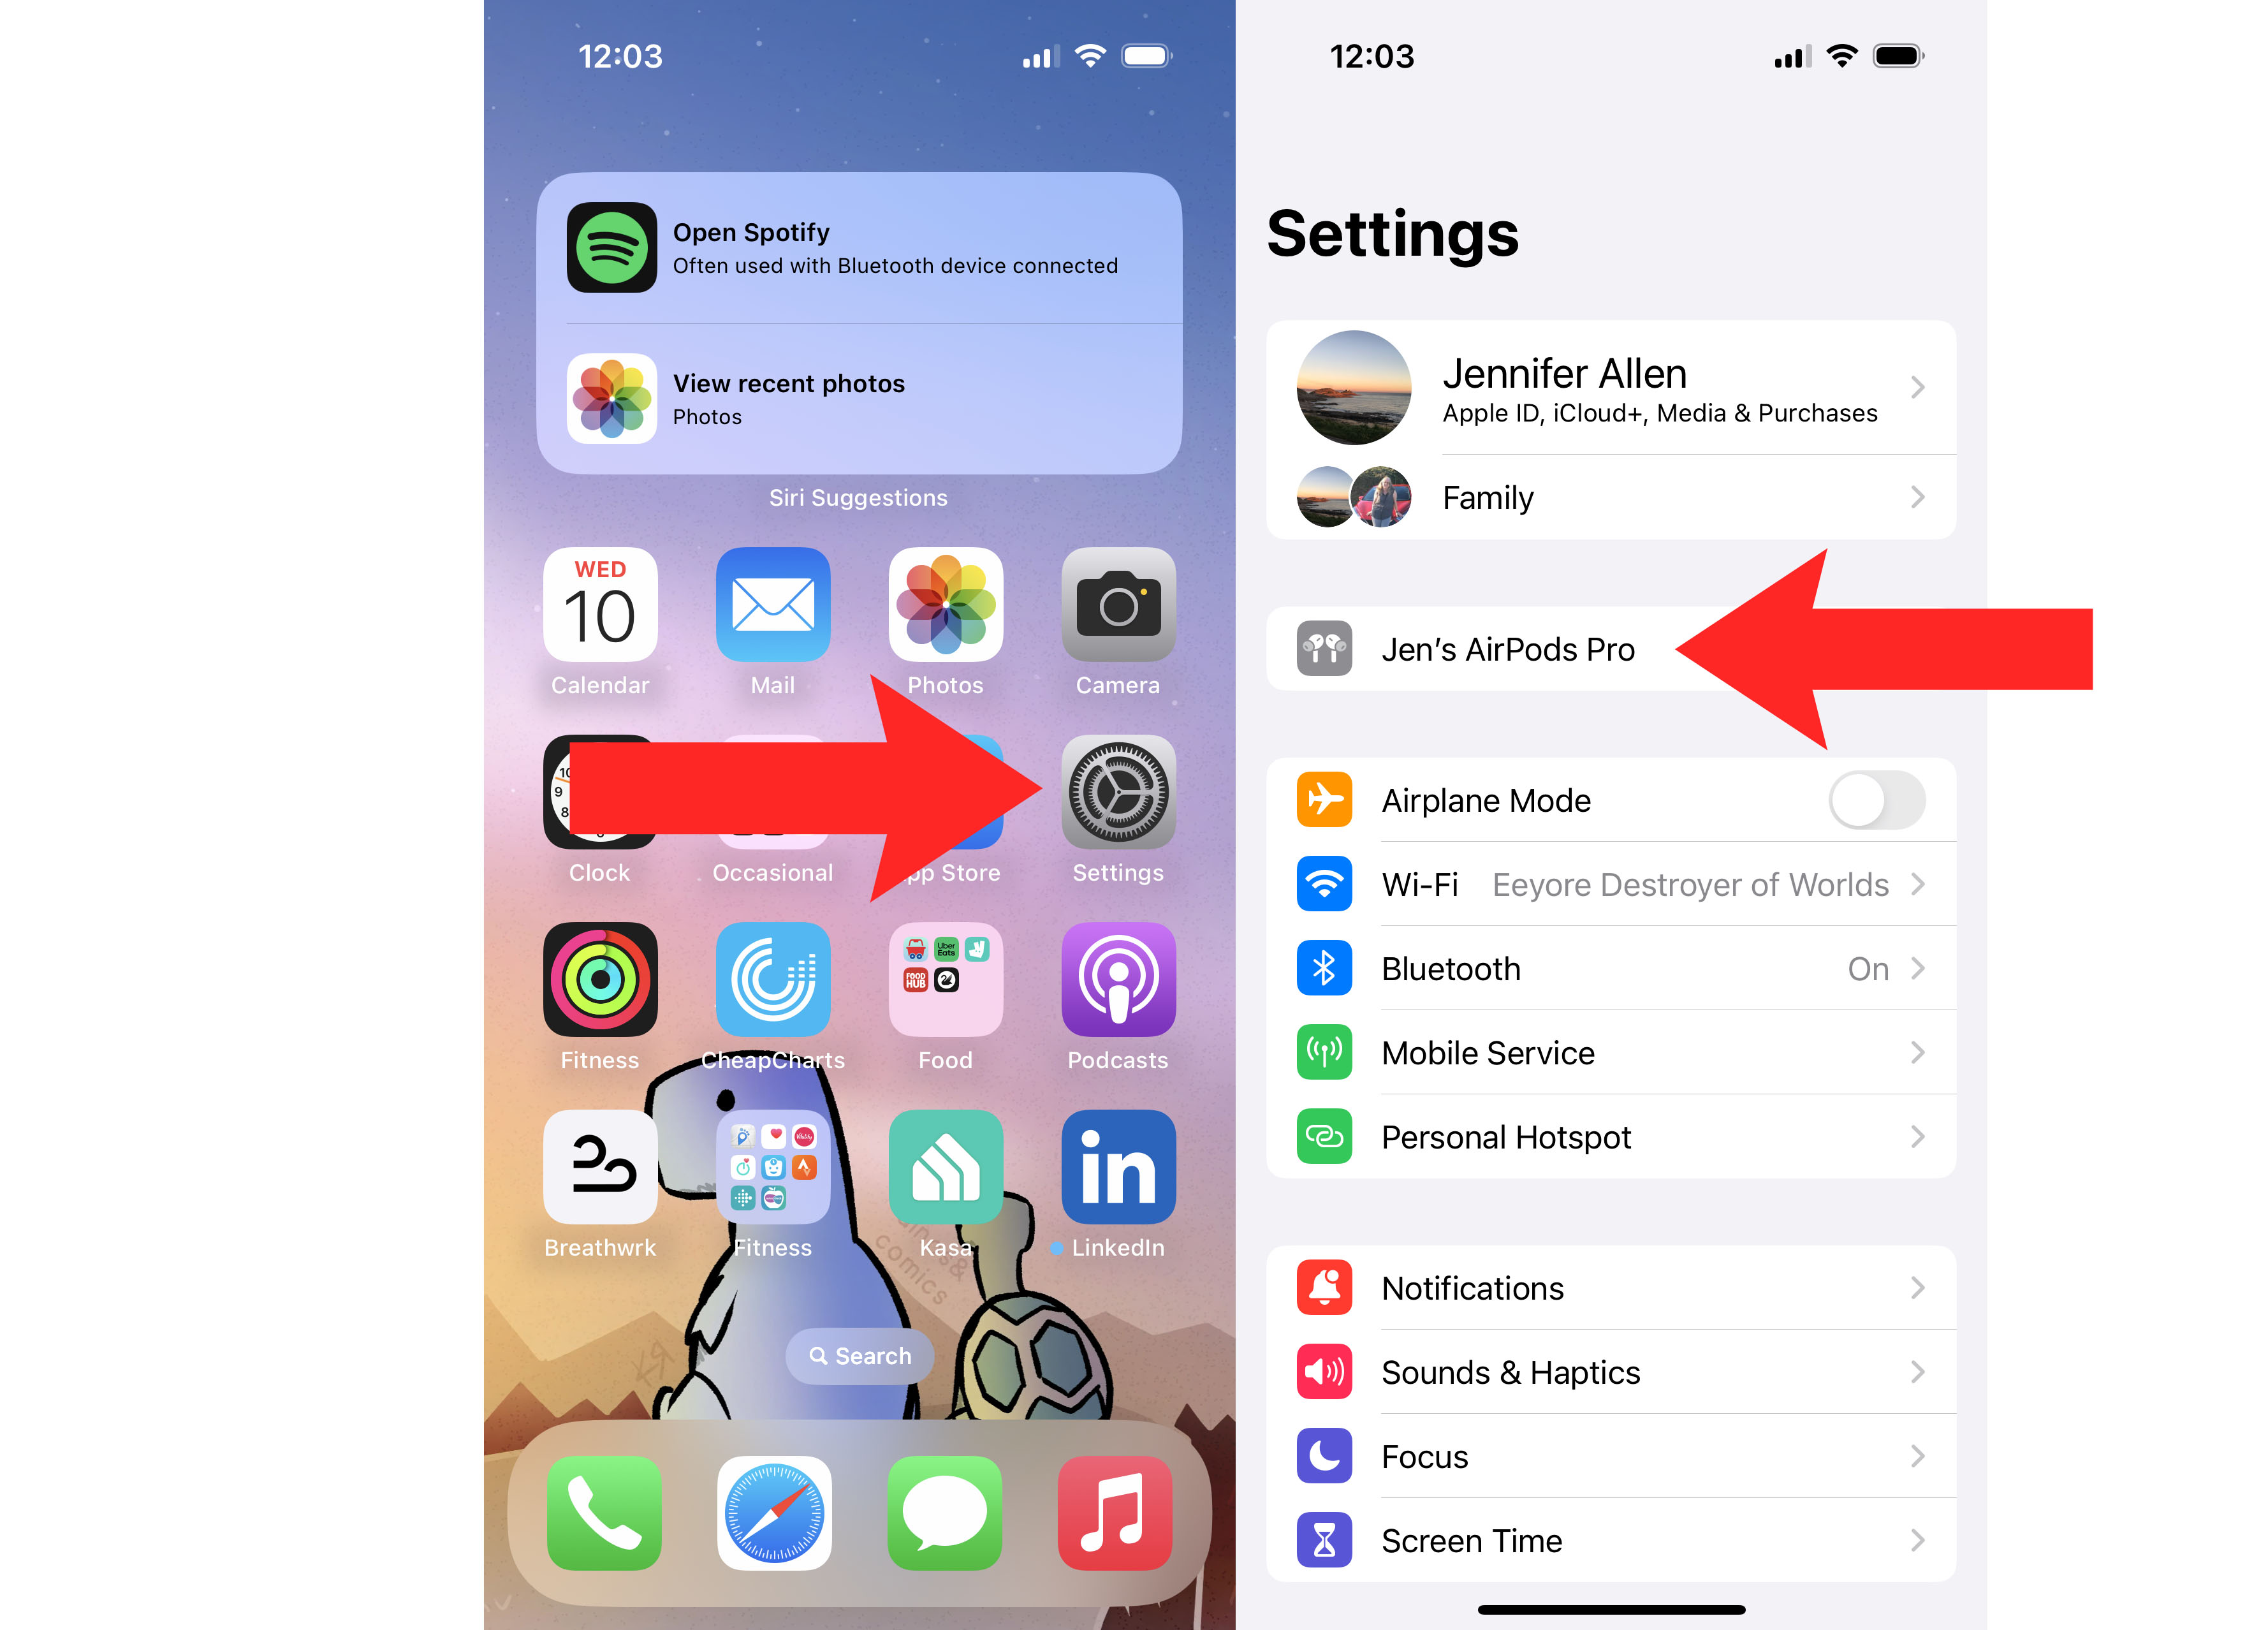
- Tap Settings on your phone’s Home Screen and tap the name of your AirPods or go to Settings > Bluetooth, and pick the earbuds in question.
- Scroll through the list of options to find what you want to change.
Step by step guide
Seek out Settings and find your AirPods

(Image: © Future)
You’ve probably already used Settings on your iPhone but if you’re new to all things Apple, it’s easy to find. Go look on the first page of your Home Screen and there it is – a grey cog with Settings written underneath. Tap that and you’ll unleash a little treasure trove of ways of changing your phone for the better. If you open the lid of your AirPods, or if you’re wearing them, then an extra option will appear right near the top, saying ‘[Your name] AirPods’. Tap this – easy!
The alternative to this is to tap the Bluetooth option, find your AirPods in the ‘My Devices’ section, and tap the ‘i’ button, which will bring you to the same screen.
Take a look through the options
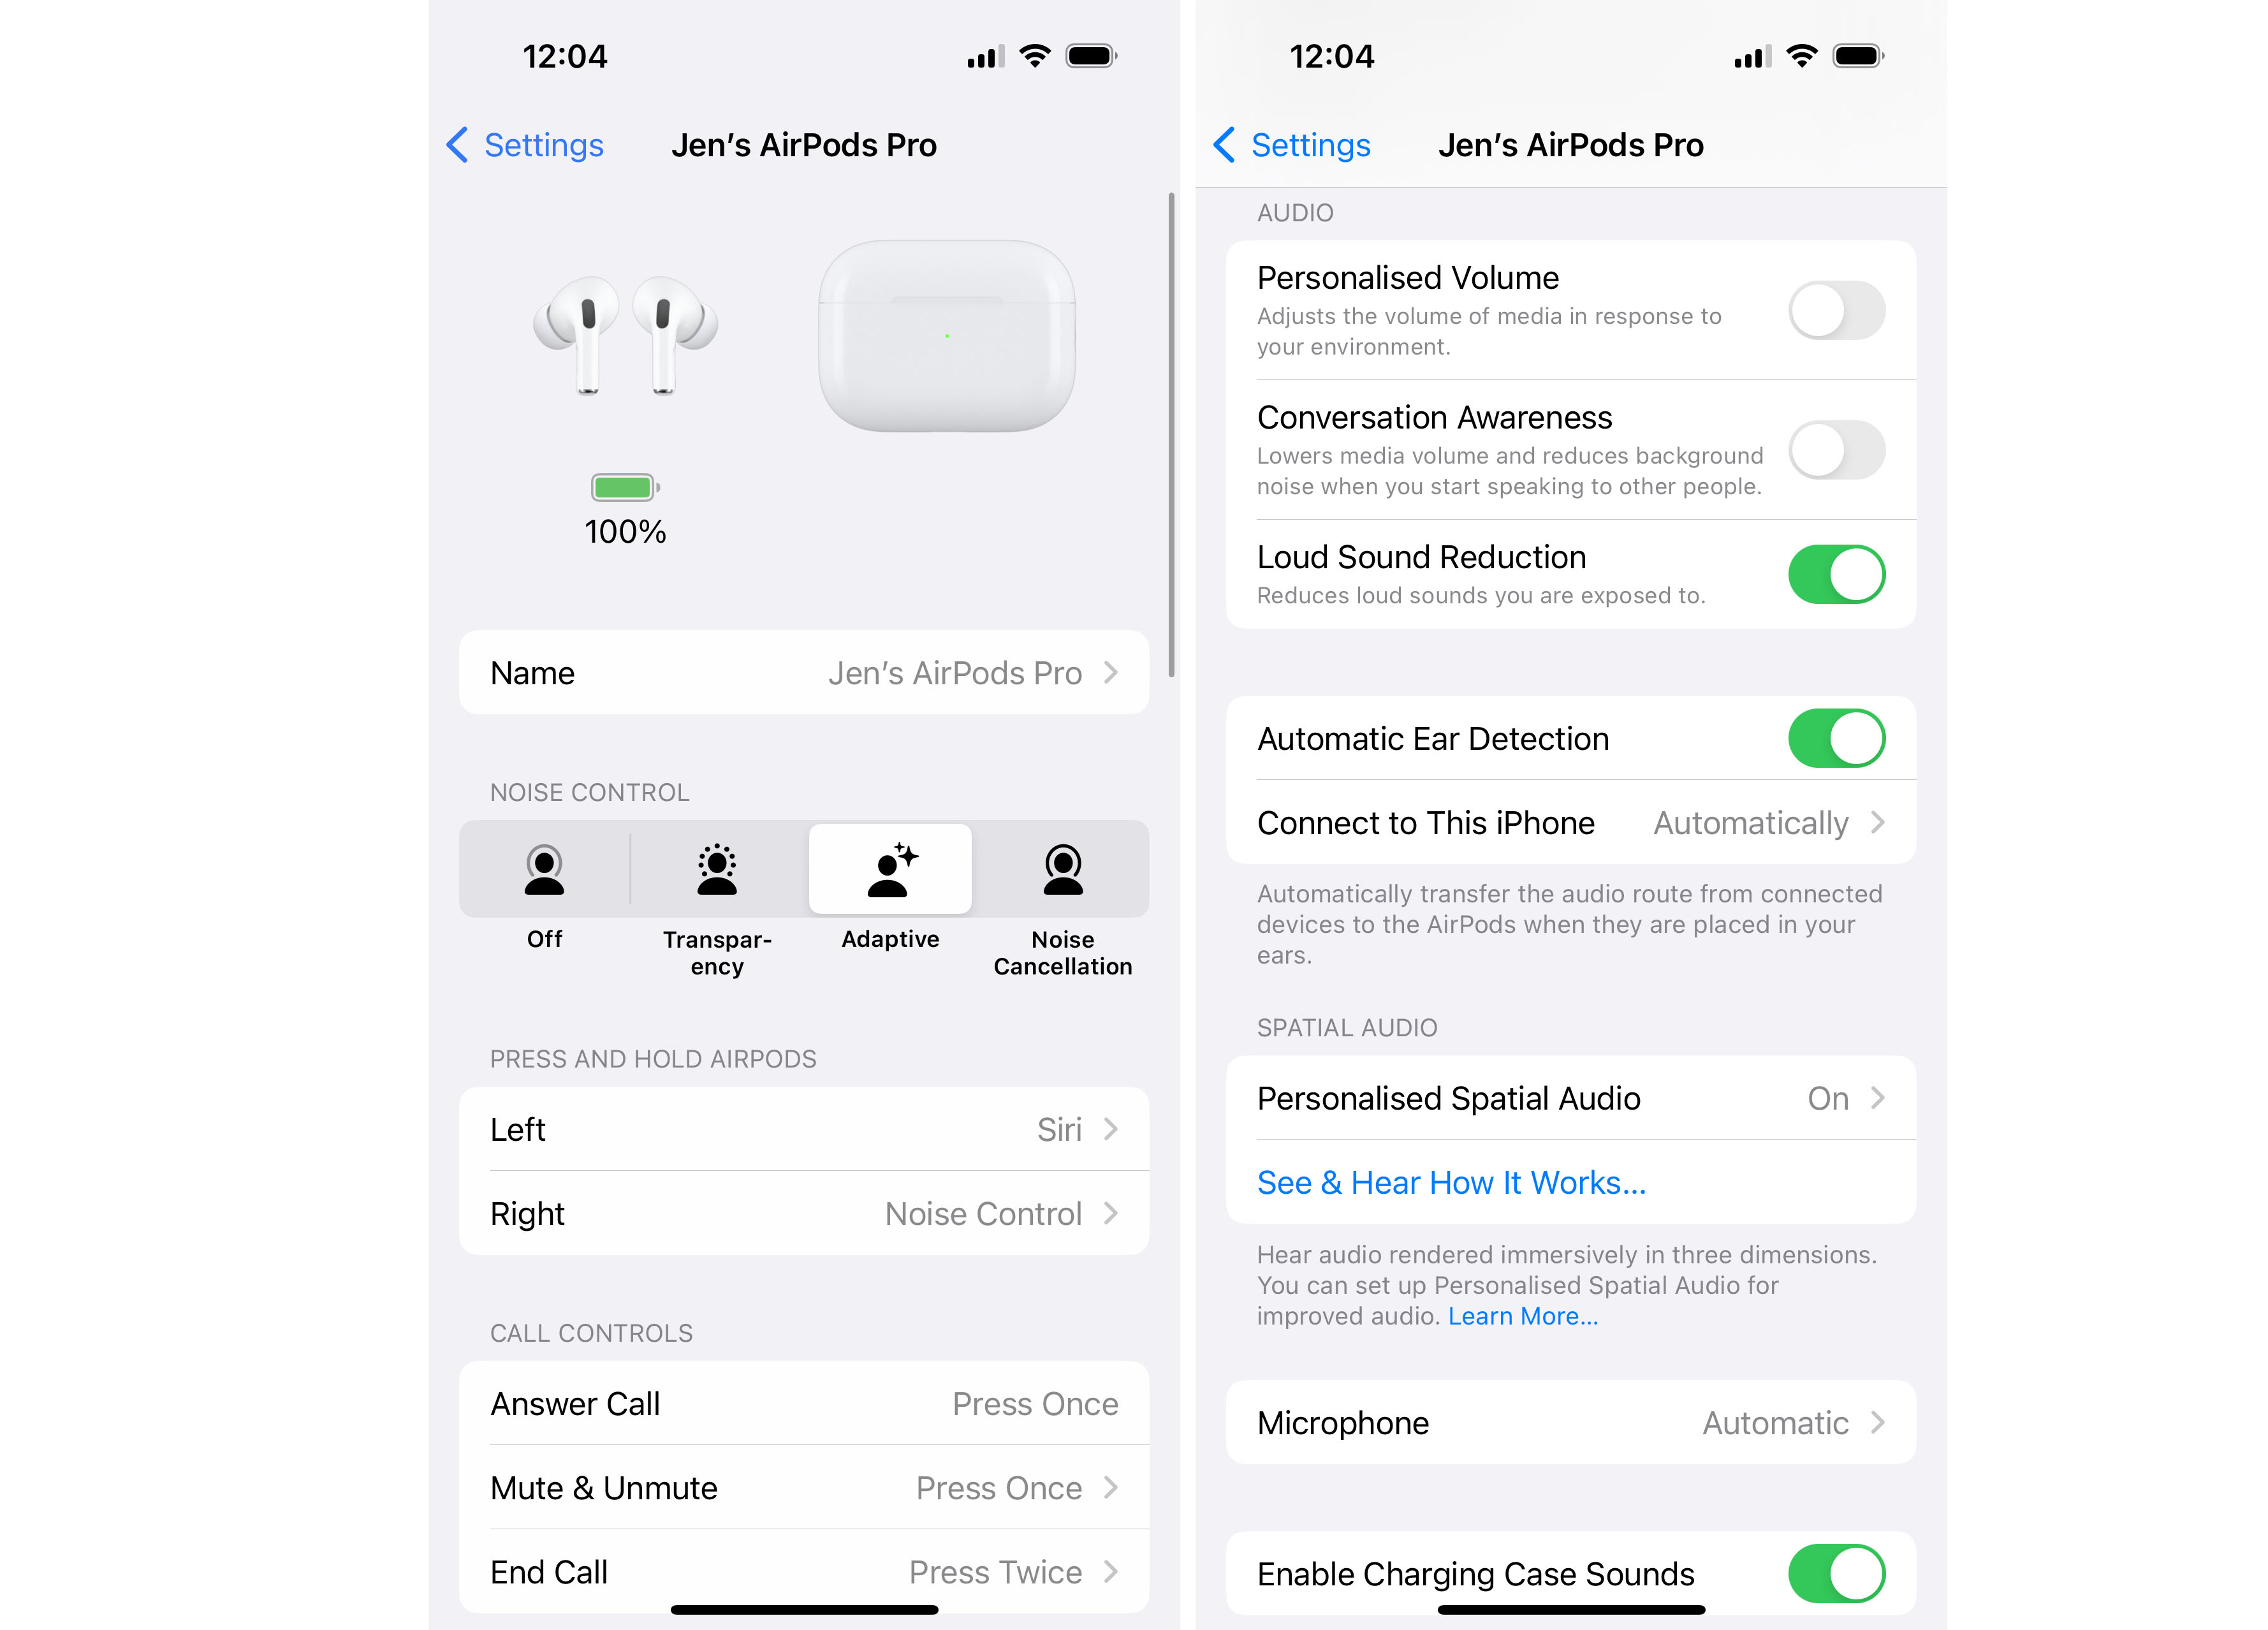
Once you’ve looked at your AirPods on Settings, a huge amount of options appear. The list varies depending on if you’re using standard AirPods or AirPods Pro, as the latter adds noise-control options, but either is pretty varied. Scroll down and see what you feel like changing, whether that’s the ANC or simply how your call controls work.
Enjoy your new experience

(Image: © Future)
When you’ve wrapped up changing things around, you can simply close Settings and such changes are automatically saved. It’s as simple as that. Knowing what to change is the tricky part. I recommend changing the call controls and what happens when you press and hold your AirPods so they suit how you use them. You can also tweak audio settings and even disable automatic ear detection if you want to (why would you though?).
How to change AirPod settings FAQs
How do I change the name of my AirPods?
Why are Press and Hold options limited?
Can I change the microphone?
How to change AirPod settings: Final Thoughts
When buying the best noise cancelling earbuds or similar, you want to feel in control. The above instructions will help you change AirPod settings but it’s also useful to learn how to make your AirPods louder, and what to do if you need to find lost AirPods. It’s surprising how much you can do with AirPods!

